What You Need
To use Change, we recommend the following hardware:
- An iPad (2nd, 3rd, or 4th Generation), iPad Air, or iPad Mini.
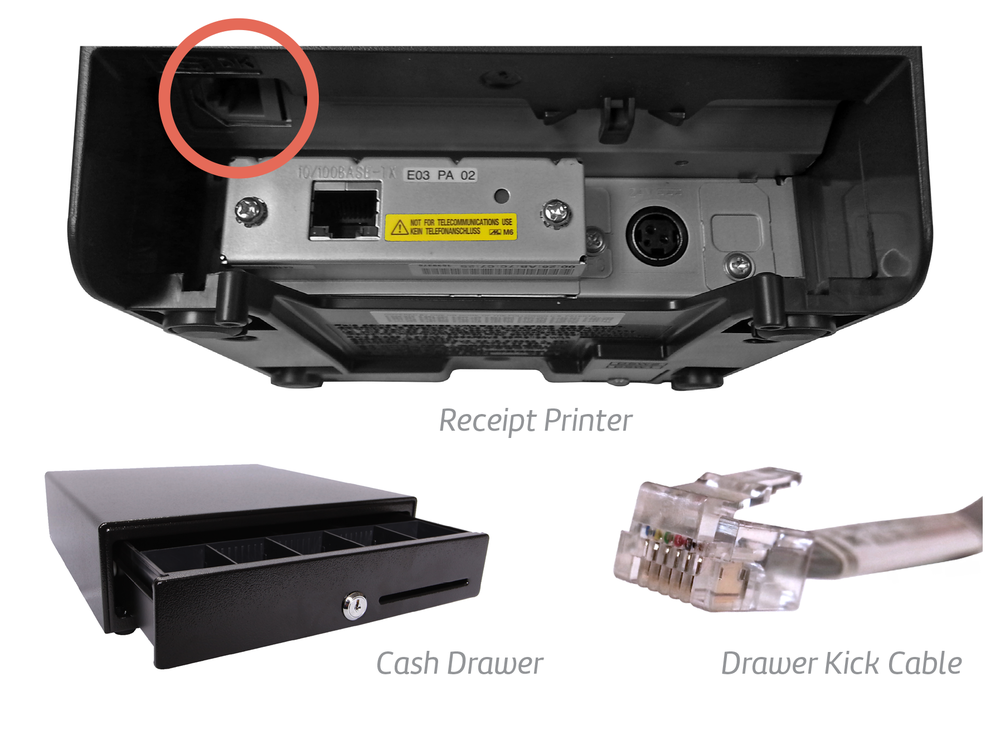
- A receipt printer
- A cash drawer
- iPad stand
Ordering the proper equipment for Change is incredibly easy to do through us and guarantees your equipment is compatible with Change.
Learn more about our equipment setup and request a quote on the Change Hardware page.
Installing Printers
First, you'll need to connect it to your network by plugging it into your wireless router or an ethernet jack.
The Epson receipt printers do not come with an assigned IP address for your network, so you must set it up to acquire one manually. Here's how:
- Download the network configuration program from Epson.
- Select either the Mac or Windows version, depending on which type of computer you own.
- Once you have installed the program, make sure your computer is connected to the same wireless network the receipt printer will be operating on.
- Plug an ethernet cable into the back of the receipt printer and into whichever router supports your network.
- Open the Epson network configuration program, EpsonNet Config, on your computer.
- Select the receipt printer you are trying to connect, and click Configuration.
- A new window will appear. Under the TCP/IP section, select the Basic menu.
- Select the Automatic setting, and the printer will configure with your network.
- Hit Transmit to complete your setup. Important! Do not skip this step.
Testing Printers
Once your printer is configured, you can test it from the Change app. From your Account Dropdown in the Action Bar tap Settings then Printers.
If no printers appear in the list on the left, tap Look for Printers. If you are still unable to find the printer, leave the app and make sure your device is connected to the same network as the printer.
When the printer appears in the list, select it to view its status, then tap Test Printer.
Installing Cash Drawers
Once you've successfully installed your printer, you can now connect the cash drawer.
- Plug the drawer kick cable into back side of the receipt printer.
- Plug the other end of the drawer kick cable into the back of the cash drawer.
The drawer kick cable allows the cash drawer to open once you have completed a transaction in Change. Test this by ringing up a cash order. The drawer should open after checkout.
Next Steps
Learn how to design your receipt and configure your email receipt options.


